How to Build a Fence Gate: A Complete Guide to Strong Design, Proper Installation, and Long-Term Durability

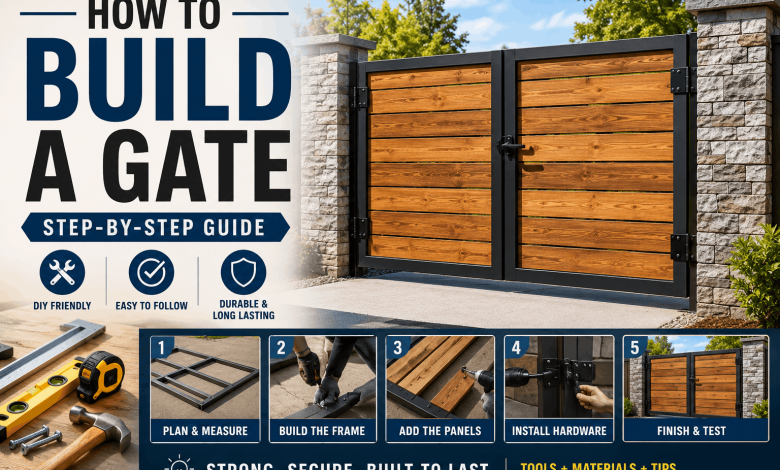
Your fence is only as good as the gate you hang on it. A gate that sags within a year, drags on the ground, or refuses to latch properly becomes frustrating fast. You end up wasting time and money trying to fix it when the real issue was poor construction from the start. Building a fence gate the right way doesn’t require advanced carpentry skills or expensive equipment, but it does require understanding a few key principles that separate gates that last for decades from ones that fail in a single season.
The good news? Knowing how to build a gate that stays square, swings smoothly, and holds its shape comes down to mastering a handful of proven techniques. In this guide, you’ll learn exactly how to build a fence gate that won’t sag, from measuring your opening to installing the final hinge.
Understanding Gate Basics and Why Most Gates Fail
Before you grab a circular saw, it’s worth knowing why gates fail in the first place. When you hang a gate from hinges on one side, gravity constantly works to pull the bottom corner on the opposite side downward. This creates a force called “racking,” where the rectangular frame gradually twists into a parallelogram. If you don’t account for this with proper bracing, even a well-built frame will sag within months.
The difference between a gate that lasts 20 years and one that fails in two years almost always comes down to one thing: how you brace it. A diagonal brace running from the bottom hinge corner to the top latch corner redistributes the gate’s weight across the entire frame instead of letting gravity concentrate on one corner. It’s not complicated, but getting the brace direction right matters tremendously.
The second reason gates fail is using the wrong fasteners. Nails will work loose over time as the wood expands and contracts with moisture and temperature changes. Exterior-grade wood screws hold much better and will keep your gate square year after year.
Measuring Your Gate Opening Correctly
This step determines everything that comes next. A gate that doesn’t fit properly in the opening will never work right, no matter how well you build it.
Start by measuring the distance between your fence posts in at least three places, both horizontally and vertically. Fence posts rarely sit perfectly straight, so you’re looking for the smallest measurement, not the largest. If the narrowest point is 44 inches across, your gate frame should be 43 inches wide, leaving about half an inch of clearance on each side.
Do the same for height. Measure from the top of your fence pickets down to the ground at several points. Write down the smallest measurement. Remember that your gate will sit about half an inch off the ground to prevent dragging in wet conditions, so subtract that from your measurement as well.
Check that your posts are plumb using a level. If a post leans significantly, it’s worth fixing before you build the gate. A post that’s more than an inch or two out of plumb will make hanging your gate difficult and affect how it swings.
Selecting the Right Wood and Materials
The wood you choose affects how long your gate lasts and how much maintenance it needs. Three materials dominate: cedar, redwood, and pressure-treated lumber.
Cedar is the most popular choice. It has natural oils that resist rot and insects, it’s widely available, and it looks good right out of the store. Cedar typically lasts 15 to 20 years with minimal maintenance. It costs more than pressure-treated pine but less than redwood. If you’re going for a warm, rustic appearance that improves with age, cedar is a strong choice.
Redwood sits at the top end for durability and appearance. Its rich reddish-brown color and straight grain pattern give gates an elegant look. Redwood contains natural tannins and oils that make it extremely resistant to rot and insects. The tradeoff is cost—redwood runs three to five times more than pressure-treated pine. If budget isn’t a constraint and you live in a region where it’s readily available, redwood is worth the investment.
Pressure-treated lumber is the budget option. It’s infused with preservatives that protect against rot, decay, and insects. It’s less expensive than cedar or redwood, which makes it popular for large projects. The natural color is yellowish-green, but it takes stain well. Pressure-treated wood requires more ongoing maintenance but will still perform well for 15+ years.
For a typical gate, you’ll need:
- Two 2×4 rails (top and bottom)
- Two vertical 2×4 stiles if building a frame-first gate, or individual fence boards for a simple design
- One 2×4 diagonal brace
- 2.5-inch exterior wood screws for the frame
- 1.5-inch wood screws for attaching pickets
- 4-inch screws for the diagonal brace
- Heavy-duty gate hinges (T-strap or strap hinges rated for your gate weight)
- A gate latch
- A handle (optional but recommended)
Building Your Gate Frame
The frame is the skeleton of your gate. Everything else depends on it being square and solid.
Cut your top and bottom rails to your gate width minus one inch. This extra inch accounts for the hinge hardware that will extend from the frame on both sides. Position the rails on a flat surface, either the ground or a workbench. If you’re working on the ground, lay them down and mark where your vertical stiles (side pieces) will attach.
Cut your vertical stiles to your gate height. Position them perpendicular to the rails, then use a tape measure to check that your frame is square. Measure diagonally from corner to corner in both directions—if the measurements are equal, your frame is square. If they’re off by more than an eighth of an inch, adjust until it’s right.
Once the frame is square, attach the rails to the stiles using exterior wood screws. Pre-drill your holes to prevent splitting, and use at least three screws per corner for strength. If you’re working on a bench, temporarily screw the frame to the bench surface to keep it from shifting as you work.
Installing the Diagonal Brace to Prevent Sagging
This is the single most important step for building a gate that won’t sag. A diagonal brace works by converting the gate’s weight into a compression force that keeps the frame square. Get the direction wrong, and it won’t do its job.
The brace must run from the bottom corner on the hinge side to the top corner on the latch side. This orientation puts the brace under compression and prevents the latch-side corner from dropping. Take a 2×4, position it across the frame from bottom-hinge to top-latch, and mark where it intersects with your rails. The ends should sit flush against both the horizontal and vertical members.
Cut the brace to length at a 45-degree angle on both ends. A miter saw gives you clean, accurate angles. Once cut, position it in the frame and attach using four-inch exterior wood screws. Pre-drill the holes, especially at the ends, to prevent splitting. Use at least two screws where the brace meets each rail. This creates a triangular substructure within the rectangular frame that resists deformation.
If you’ve done this right, your gate frame now has tremendous rigidity. You should be able to push on the frame and feel no flex. If it still feels loose, add a second brace running in the opposite direction (from top-hinge to bottom-latch) to create an X pattern, though this is typically only necessary for very large or heavy gates.
Attaching the Gate Pickets
With your frame and brace complete, it’s time to add the pickets that make up the face of the gate.
If you’re matching an existing fence, measure from the top of the fence down to the center of your bottom rail to determine where your pickets should sit vertically. This alignment makes the gate look like a natural extension of the fence. Mark a line across your frame at this height to use as a guide.
Start on the hinge side. Position your first picket flush with the edge of the frame and secure it with 1.5-inch exterior wood screws. Use two screws in the top rail, two in the diagonal brace, and two in the bottom rail for total coverage. Space the second picket about an eighth of an inch away from the first to allow for expansion and contraction. Continue adding pickets across the frame until you’ve covered the entire gate.
Pre-drill every screw hole to prevent the wood from splitting. If your pickets are freshly cut, you may need clamps or a helper to hold them tight against the frame while you screw them down. Wet lumber especially wants to shift.
Hanging Your Gate Hinges
Choose hinges rated for your gate’s weight. For most residential wooden gates, T-strap hinges or heavy-duty strap hinges work well. They distribute the load across a larger area than standard door hinges and last much longer in outdoor conditions.
Position your hinges on the stile where the gate will attach to the fence post. For a typical 4-foot-tall gate, place one hinge about 12 inches from the top and another about 12 inches from the bottom. A third hinge in the center adds extra support for heavier gates.
When hanging the gate, don’t drive all the screws completely home at first. Start with just the top hinge and use the center hole only. This gives you room to adjust the gate if your posts aren’t perfectly straight. Once you’ve verified the gate hangs straight and swings smoothly, you can fully tighten everything.
Position your gate in the opening using half-inch wooden spacers under the bottom to keep it off the ground. The gate should have about half an inch of clearance on both sides. Once it’s in the right position, finish tightening the hinge screws and remove the spacers.
Adding Latches, Handles, and Hardware
A gate without a latch is just a swinging door. Install your latch about two-thirds of the way up the gate. This height is ergonomic and prevents the most strain on the latch mechanism.
Most latches come with instructions for mounting. Typically, you’ll attach the strike plate to the fence post and the catch mechanism to the gate. Pre-drill your holes with the size bit specified in the instructions—usually a 3/16-inch bit—to prevent splitting.
Add a handle on the same side as the latch to make opening the gate one-handed. You can install a matching handle on the outside of the gate if you want to make it look finished on both sides.
Choosing Wood Type Based on Your Climate
Where you live affects which wood performs best. If you’re in a wet, humid climate, cedar or redwood with their natural oils will outlast pressure-treated pine. The moisture resistance of these woods prevents warping and mold growth.
In dry climates, pressure-treated lumber actually performs very well because the low humidity means less wood movement. Cedar can fade faster in strong sun without regular sealing.
In areas with significant temperature swings, stability matters more than anything. Woods that are kiln-dried move less than green lumber, so buy the best quality you can afford. This is one place not to skimp.
Budgeting and Cost Expectations
A typical 4-foot-wide, 4-foot-tall gate built with cedar will cost between $150 and $300 in materials, depending on local prices and the quality of wood you select. Pressure-treated gates cost $100 to $200. Redwood gates run $300 to $500.
Add another $50 to $100 for quality hinges, a latch, and a handle. Fancy hardware or unusual designs will increase costs.
The entire project typically takes four to eight hours for a first-timer, including trips to the hardware store. If you’re comfortable with tools and have done similar projects, you can do it in three to four hours.
Common Mistakes to Avoid
- Skipping the diagonal brace. You might think a heavy-duty frame is enough. It’s not. The diagonal brace is non-negotiable if you want a gate that lasts.
- Using nails instead of screws. Nails will work loose and your gate will develop gaps and sag. Spend the extra few dollars on exterior-grade wood screws.
- Not accounting for ground clearance. A gate that touches the ground when wet will swell and drag. Always build to sit at least half an inch off the ground.
- Hanging hinges on the pickets alone. Hinges must attach to the solid frame members, not just the face boards. The pickets alone can’t support the gate’s weight long-term.
- Measuring only once. Fence posts are rarely perfectly straight. Measure in multiple locations to find the actual opening size.
Maintenance to Keep Your Gate Working
Your gate will last longest with basic annual maintenance. Once a year, inspect it for rot or insect damage, especially at the base. Clean the hinges and latch with a wire brush to remove debris.
Sealing your gate every two to three years protects the wood from moisture penetration. Use a water-repellent sealant designed for exterior wood. Cedar and redwood benefit from a clear sealant that preserves their color. Pressure-treated wood can be stained for better appearance.
If your gate does start to sag, a cable-and-turnbuckle tension system can pull it back into square. This isn’t a replacement for proper construction, but it’s a good option if an old gate needs rescue.
Frequently Asked Questions About How to Build a Fence Gate
How wide should my gate be?
Your gate should be one inch narrower than the distance between your fence posts at the narrowest point. Measure in multiple locations and use the smallest measurement. A gate that’s too wide won’t fit; one that’s too narrow allows animals or objects to slip through.
Can I build a gate using only horizontal boards?
Yes, but you’re creating extra work for yourself. A simple frame-and-board design is easier to build and much stronger than stacking horizontal boards alone. The frame provides the structural support; the boards provide the visual effect.
What’s the best hinge style for wooden gates?
T-strap hinges or heavy-duty strap hinges are the standard for wooden gates. They distribute weight across a large area and resist rust in outdoor conditions. Heavy gates benefit from at least three hinges; lighter gates work fine with two.
How long does it take to build a gate?
Plan for four to eight hours for your first gate, including shopping for materials. If you’re comfortable with carpentry, three to four hours is realistic. Complex designs or decorative details will extend the time.
Can I paint my wooden gate?
Absolutely. Paint protects the wood and lets you match your home’s color scheme. Use exterior-grade paint rated for wood. Pressure-treated lumber especially benefits from paint to improve its appearance. Cedar and redwood look great stained to show off their natural grain.
What if my gate sags after I build it?
A diagonal brace installed from bottom-hinge to top-latch should prevent sagging. If it happens anyway, check that your brace is properly seated and fastened. A cable-and-turnbuckle system can restore a sagged gate, though it’s better to prevent sagging from the start with correct construction.
Do I need a permit to build a gate?
Check with your local building department. Most residential gates don’t require permits, but some municipalities have requirements for fence height, setback from property lines, or gate construction methods. It’s worth a five-minute phone call to confirm.
Next Steps: Build Your Gate with Confidence
Building a fence gate that won’t sag and will last for decades comes down to understanding the forces at work and using the right techniques. A properly constructed diagonal brace, quality exterior screws, and measurement accuracy are the three non-negotiables. Everything else flows from those principles.
Start with accurate measurements, choose wood suited to your climate, build your frame square, install your brace from bottom-hinge to top-latch, and hang everything with quality hardware. Follow this process and your gate will swing smoothly and look great for 20+ years.